Sunday, August 08, 2010

Too blogging busy

Apologies for the delay in posting of late.

Let me cast my mind back...back...back. Oh yes, I'm there now.

I passed my Mod 2. Hurrah. 

Which meant that I am now a fully qualified bike rider, with all thanks due to Biketrain Wales. 

So, with some trepidation I stopped the restoration activities and got round to trying the beast.

Fully kitted up I approached The Beast for the first time as a qualified rider. I wheeled her out into the sunshine, climbed on, stand up... choke in... press the starter...and a rather pathetic whimper of the engine. 

Tits.

After a month in the garage the battery had had enough. I got online and solicited opinions. 

A quick check of the voltage with a multimeter showed that it wasn't dead, just resting. So I called Garn Motorcycles and they had an Optimate in stock.

Onto the Varadero 125 and I was off. They had just resurfaced our road and the bike felt a bit sketchy, so I popped into the garage to check the air in the tyres. In the rear there was... no air. 

Arse.

I filled it up and very calmly rode to the garage - a fantastic hill over to Blaenavon - where the culprit was a 1cm long piece of slate. We get a lot of that round here. 

If you get the chance to go to Garn Motorcyles, go. It's a proper, proper bike shop. Four mechanics who actually know what they are doing and a great selection of old bikes. They were really friendly and let me hand around and generally bother them while they replaced the tyre.

All sorted, I went home and plugged the Optimate in, finding out in the process that the panel was attached by just the studs. I left it to charge overnight and had a cup of tea...

Sunday, July 11, 2010

The rough and the smooth

I managed to get some quality time in today after a week of working and no tinkering.

I wasn't sure what I wanted to do so thought I'd remove the rear rack as the next candidate for stripping. This led to me removing the seat to get at the indicator wiring which was a festival of insulating tape and solder. Not at all how it looked in the Haynes manual.

The more I peel back the layers of the bike the more attention I think it could do with. It is a dilemma because I do not see this as a project, I want to be riding it, so there's no way I'm stripping it down to the frame but that is what it probably needs.

The upshot of all this internal debate was that I thought I'd better get a move on, so I decided to take the plunge into the spraying.

Having researched aerosol painting extensively I had a good game plan:

1) Shake paint well
2) Warm the piece being sprayed
3) Spray light coats and keep using the heat gun
4) er...repeat

I had already constructed a spray booth that I affectionately called Dr Caligari's Cabinet (it's an old horror film, I've never seen it but remember the title from somewhere). Here it is:


It involves an upended cabinet clamped onto a Workmate with a rock in a paint bucket for added stability. Screwed in the top is a battery powered motor for a glitterball that gently rotates the object being sprayed.

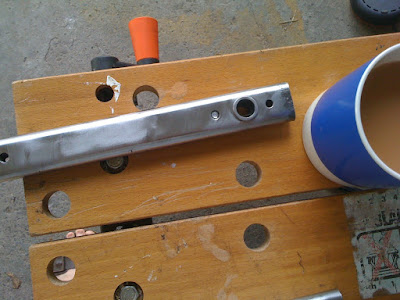
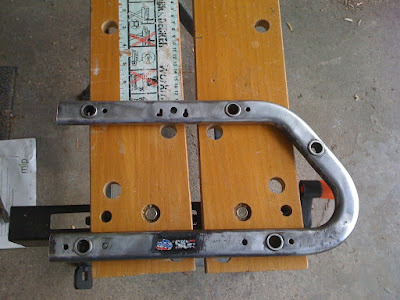
The next thing I had to do was prepare the pieces to be sprayed. I'd previously thought they were ready but having thought about the lumpy finish and how this would be a shame I tried giving it one last go with some super-coarse paper. (Essentially gravel stuck to paper). The result was gobsmacking. Here's the piece before sanding, with corrosion visible:


Following a hard sand, followed by a fine sand it looked like this:


Not perfect but an amazing improvement on an amazing improvement (see here to see just how grim it was). The only downside was that my evening became an evening of sanding. Again.

After the fine sanding (using flexible sanding pads I picked up ages ago, which were very handy) I gave the piece a wipe over with white spirit and hung it to dry. I was thus ready to spray.

Only then did I read the instructions on the can.  No huge surprises but Hammerite needs 3-4 coats with 15 min intervals so I built a makeshift drying rack held by my bicycle workstand to form a production line.

All set  and the first piece went in. Motor on, air gun on (about 65% power - I have a posh DeWalt hot air gun with heat control), let's spray. As I suspected I tried too hard to cover the piece and it formed a drip. What a novice.


You can just about see the drip. What black there is is looking good, though.

I realised then that I was breaking my own cardinal rule of BE PATIENT. I calmed down and moved the piece to the drying rack. Then I dropped it. That'll teach me.

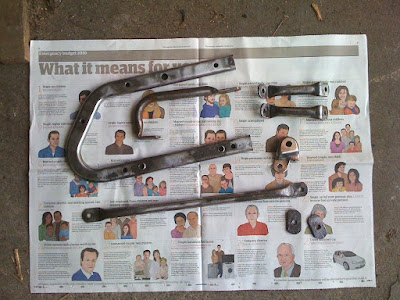
I proceeded to put a thin coat on most of the other pieces. Some were better than others. The drying rack was a great idea. Here are the results at the end of this evening. It's not brilliantly clear, I'll try again in the daylight.


Lessons learned today

1.) Be patient
2.) Preparation is everything
3.) Prepare the work environment too (I'll try warming the can as well)
4.) Clean the nozzle. It jammed up, so I used another and soaked the jammed one in white spirit. From now on I tip the can upside down and give it two good bursts after spraying.
5.) Spend longer heating the items. I think I was too hasty at first.
6.) Be patient

So a bit of sanding to rectify the drips and a few more coats tomorrow lunchtime I hope.

Tuesday, July 06, 2010

Shooting my bolt

So, yes, about this sheared bolt.

Oh, before I start, I passed my Mod 1 test today. Thanks www.biketrainwales.co.uk. Mod 2 next week.

Anyway, the sheared bolt. Here it is with a lovely cup of tea, my most important tool:


It was royally embedded and I had been liberally applying WD40 on a daily basis but with no discernable result. Having read numerous websites I decided to try drilling it out, in the hope that the bolt would miraculously float off the threads. Well, I punched the centre then set up the bench press with my drill in it (thanks F-in-L) and clamped the frame down good and proper. You'll see I hadn't yet tidied the garage:


I successfully popped a hole through the bolt. Nothing happened. So I tried hammering a Torx bit in and turning that with a spanner. Nothing happened. Well, it stripped a bit more metal out. So I kept drilling with larger bits until it seemed like most of the bolt was gone. I may have left it overnight soaked in WD40. Nothing happened. Then I sparked up the Dremel


That Dremel bit fitted straight through the opposite hole, so I kept going and poking with an old dentist's pokey thing.  A tiny bit of thread came loose (see above) nothing much else happened until the Dremel bit broke off. Damn that bolt's a tough sucker.

Reading more internet sites, I bought a screw extractor kit. But I didn't have a suitable handle and I think I'd drilled out too much already. I kept tentatively enlarging the hole with a Dremel grinding bit. A teeny-tiny piece of thread came off that cheered me up no end. I left it for another night with the WD40 treatment and thought hard.

My next thought was to re-cut the thread. I reckoned that if I ground enough away I could use my freshly purchased tap-and-die set to clear out the remainder. So the process was: grind a bit with Dremel, try a tap. Grind a bit, try the tap. To be honest, I thought I'd messed it all up but I should have more faith, eventually I got purchase and the damn thing worked. It felt the same as catching my first fish:


Finally the tap broke through and bit into the metal. To say I was pleased would be a huge understatement. I tried the thread with another bolt and it held. So I greased up the existing stud and checked it fitted. It did, here it is with the persistent bit of bolt thread that has been my nemesis:


What a relief!

All the time I have been leaving the other half of the pannier frame well alone, just spraying it with WD40 (apparently it needs at least 24hrs to work). Flushed with my bolt removing success I gave the bolts on the other pannier rack a turn. They are still pretty stiff. This time I left them. You see? I'm learning!

Lessons I've Learned


Whilst it might have been cheaper and easier to just put a thinner bolt through the hole, the pleasure of sorting out the problem far outweighs the quick solution. I realise that I'm doing this not just to improve the bike but to prove to myself I can solve these problems.

Next up is removing the rear indicators and rear carrier to strip the scabby paint off it. Then onto the painting, which I'm not looking forward to.

What should be in the toolkit

I posted on xrv.org.uk (http://www.xrv.org.uk/forums/transalp/47932-what-should-600-toolkit.html#post480707) to ask what should be in the tiny toolbox under the rack and rlkat took a great photo for me:

IMGP0081 | Flickr - Photo Sharing!

Gives me a guide to start collecting them when I see them.

The description for them is here:


Monday, July 05, 2010

The first engagement - the pannier rack

That's not actually true that the panniers were the first thing I did. I did successfully remove a sticker from the windscreen using lighter fluid and an old Nectar card.

Flushed with the success of this, I tried to buff up the pitted wheels. It seemed far too much like hard work with little results, so I resolved to come back to that some other time. Like the winter.

Clearly I needed to dismantle something. That something was to be the pannier rack which looked like it was painted with oil paint or something. There were signs of corrosion and it wasn't pretty:


So I unscrewed everything and began to get the measure of the beast. The underside was caked in hardened muck. The bolts were Heinz 57 varieties and one sheared off with minimal pressure. Fortunately that one was through the rack and mudguard so it slid out.

Eventually I had two halves of the pannier racks in the garage.


Using my trusty drill and a wire brush from Wilkinsons (good old Wilkos) I set about it. Just about nothing happened, which was far from what I was expecting. As luck would have it, I'd also bought some paint stripper, thinking it would come in handy some day. that afternoon, in fact. So the dismantled frame was liberally daubed with the foul paintstripper and left for half an hour.


(It is worth mentioning two things - I kept the bolts in labelled tins and butter tubs, I've since bought a box with dividers for that. Also I left one side well alone to help me put one back together and not to make mistakes on the whole thing).

Half an hour later and the scraper came out and the paint fell away to reveal mainly good metal with a few scabby corroded parts.


I had gently avoided the fixings and rubber bumpers, having seen the toothbrush dissolve before my eyes. Now I plucked up the courage to remove them. The bumpers and end pieces came off easily. The latch and one of the mounting studs came off with a bit of WD40 and elbow grease. The other mounting stud came off in my hand. Oops, I thought it was a bit stiff. More on that later.

I went at it with the drill and wire brush and it was quite time consuming. In the process I did reveal a label that identified the panniers as Nonfango Side racks. Apparently Nonfango went bust and then came back to life again. Current Givi racks look very similar but much flimsier. (Notice sheared bolt to left of label)


A bit more painstaking brushing and the first side was finished. It must have taken about four or five hours in total but the result is really pleasing:


So there we are. All ready to move onto the Hammerite spraying. I've just got to remove that broken bolt...

Lessons learned so far

1. Be patient. If the bolt's not moving, give it some WD40 and come back tomorrow
2. Have something else to do. While I was waiting for the stripper I was having a go at the wheels. Made me much less inclined to hurry it.
3. Tidy your damn garage. I did this last night. today was much better. In the winter it'll be really important.

Chocks away

Well that's the blog started. Getting the layout right only took 20 minutes. About as long as I usually spend staring at a bolt head that has sheared off in my hands.

I have had my first week of ownership and have started work and already had two bolt failures. More on that later.

Before I start, read Mike Prince's blog (in links) and see how it should be done. It's all his fault. If I'd not read it I wouldn't have started.

Ready? Let's begin.