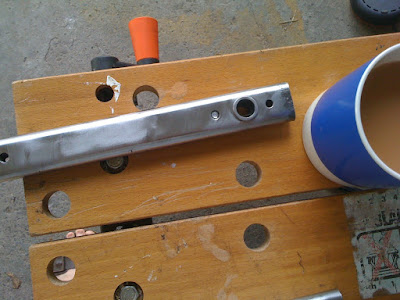
So, yes, about this sheared bolt.
Oh, before I start, I passed my Mod 1 test today. Thanks www.biketrainwales.co.uk. Mod 2 next week.
Anyway, the sheared bolt. Here it is with a lovely cup of tea, my most important tool:
It was royally embedded and I had been liberally applying WD40 on a daily basis but with no discernable result. Having read numerous websites I decided to try drilling it out, in the hope that the bolt would miraculously float off the threads. Well, I punched the centre then set up the bench press with my drill in it (thanks F-in-L) and clamped the frame down good and proper. You'll see I hadn't yet tidied the garage:
I successfully popped a hole through the bolt. Nothing happened. So I tried hammering a Torx bit in and turning that with a spanner. Nothing happened. Well, it stripped a bit more metal out. So I kept drilling with larger bits until it seemed like most of the bolt was gone. I may have left it overnight soaked in WD40. Nothing happened. Then I sparked up the Dremel
That Dremel bit fitted straight through the opposite hole, so I kept going and poking with an old dentist's pokey thing. A tiny bit of thread came loose (see above) nothing much else happened until the Dremel bit broke off. Damn that bolt's a tough sucker.
Reading more internet sites, I bought a screw extractor kit. But I didn't have a suitable handle and I think I'd drilled out too much already. I kept tentatively enlarging the hole with a Dremel grinding bit. A teeny-tiny piece of thread came off that cheered me up no end. I left it for another night with the WD40 treatment and thought hard.
My next thought was to re-cut the thread. I reckoned that if I ground enough away I could use my freshly purchased tap-and-die set to clear out the remainder. So the process was: grind a bit with Dremel, try a tap. Grind a bit, try the tap. To be honest, I thought I'd messed it all up but I should have more faith, eventually I got purchase and the damn thing worked. It felt the same as catching my first fish:
Finally the tap broke through and bit into the metal. To say I was pleased would be a huge understatement. I tried the thread with another bolt and it held. So I greased up the existing stud and checked it fitted. It did, here it is with the persistent bit of bolt thread that has been my nemesis:
What a relief!
All the time I have been leaving the other half of the pannier frame well alone, just spraying it with WD40 (apparently it needs at least 24hrs to work). Flushed with my bolt removing success I gave the bolts on the other pannier rack a turn. They are still pretty stiff. This time I left them. You see? I'm learning!
Lessons I've Learned
Whilst it might have been cheaper and easier to just put a thinner bolt through the hole, the pleasure of sorting out the problem far outweighs the quick solution. I realise that I'm doing this not just to improve the bike but to prove to myself I can solve these problems.
Next up is removing the rear indicators and rear carrier to strip the scabby paint off it. Then onto the painting, which I'm not looking forward to.


Giles, I enjoyed your account of removing the stubborn stud, its always a relief when it come out clean, I had to do much the same to a sheared off head stud on the Seven. A good tip is to try and get some Plus Gas. Its much like WD40 but better, its been around for years but does not appear to be so accessable as it used to be. You may find it in one of those old fashioned car shops or hardware shop. Another trick is to try heating up surrounding metal whith a blow touch while you apply the extractor. heating expands the outer and is sometimes enough to release the grip. Good luck with the test, keep me posted. Regards. Les
ReplyDelete